(Answers) 10.6.7 Lab – Using Wireshark to Examine HTTP and HTTPS Traffic
10.6.7 Lab – Using Wireshark to Examine HTTP and HTTPS Traffic (Instructor Version)
Instructor Note: Red font color or gray highlights indicate text that appears in the instructor copy only.
Objectives
- Part 1: Capture and view HTTP traffic
- Part 2: Capture and view HTTPS traffic
Background / Scenario
HyperText Transfer Protocol (HTTP) is an application layer protocol that presents data via a web browser. With HTTP, there is no safeguard for the exchanged data between two communicating devices.
With HTTPS, encryption is used via a mathematical algorithm. This algorithm hides the true meaning of the data that is being exchanged. This is done through the use of certificates that can be viewed later in this lab.
Regardless of HTTP or HTTPS, it is only recommended to exchange data with websites that you trust. Just because a site uses HTTPS does not mean it is a trustworthy site. Threat actors commonly use HTTPS to hide their activities.
In this lab, you will explore and capture HTTP and HTTPS traffic using Wireshark.
Required Resources
- CyberOps Workstation VM
- Internet connection
Instructions
Part 1: Capture and View HTTP Traffic
In this part, you will use tcpdump to capture the content of HTTP traffic. You will use command options to save the traffic to a packet capture (pcap) file. These records can then be analyzed using different applications that read pcap files, including Wireshark.
Step 1: Start the virtual machine and log in.
Start the CyberOps Workstation VM. Use the following user credentials:
Username: analyst
Password: cyberops
Step 2: Open a terminal and start tcpdump.
a. Open a terminal application and enter the command ip address.
[analyst@secOps ~]$ ip address
b. List the interfaces and their IP addresses displayed in the ip address output.
c. While in the terminal application, enter the command sudo tcpdump –i enp0s3 –s 0 –w httpdump.pcap. Enter the password cyberops for the user analyst when prompted.
[analyst@secOps ~]$ sudo tcpdump –i enp0s3 –s 0 –w httpdump.pcap
[sudo] password for analyst:
tcpdump: listening on enp0s3, link-type EN10MB (Ethernet), capture size 262144 bytes
This command starts tcpdump and records network traffic on the enp0s3 interface.
The -i command option allows you to specify the interface. If not specified, the tcpdump will capture all traffic on all interfaces.
The -s command option specifies the length of the snapshot for each packet. You should limit snaplen to the smallest number that will capture the protocol information in which you are interested. Setting snaplen to 0 sets it to the default of 262144, for backwards compatibility with recent older versions of tcpdump.
The -w command option is used to write the result of the tcpdump command to a file. Adding the extension .pcap ensures that operating systems and applications will be able to read to file. All recorded traffic will be printed to the file httpdump.pcap in the home directory of the user analyst.
Use the man pages for tcpdump to determine the usage of the -s and -w command options.
d. Open a web browser from the launch bar within the CyberOps Workstation VM. Navigate to http://www.altoromutual.com/login.jsp
Because this website uses HTTP, the traffic is not encrypted. Click the Password field to see the warning pop up.
e. Enter a username of Admin with a password of Admin and click Login.
f. Close the web browser.
g. Return to the terminal window where tcpdump is running. Enter CTRL+C to stop the packet capture.
Step 3: View the HTTP capture.
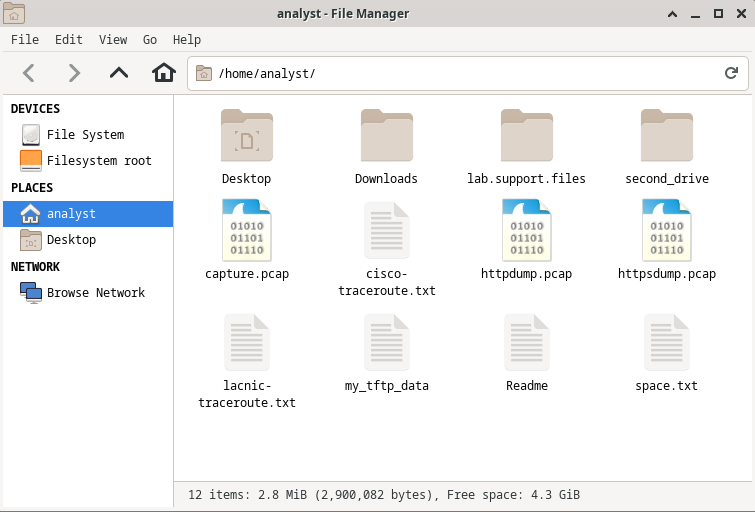
The tcpdump, executed in the previous step, printed the output to a file named httpdump.pcap. This file is located in the home directory for the user analyst.
a. Click the File Manager icon on the desktop and browse to the home folder for the user analyst. Double-click the httpdump.pcap file, in the Open With dialog box scroll down to Wireshark and then click Open.

b. In the Wireshark application, filter for http and click Apply.

c. Browse through the different HTTP messages and select the POST message.
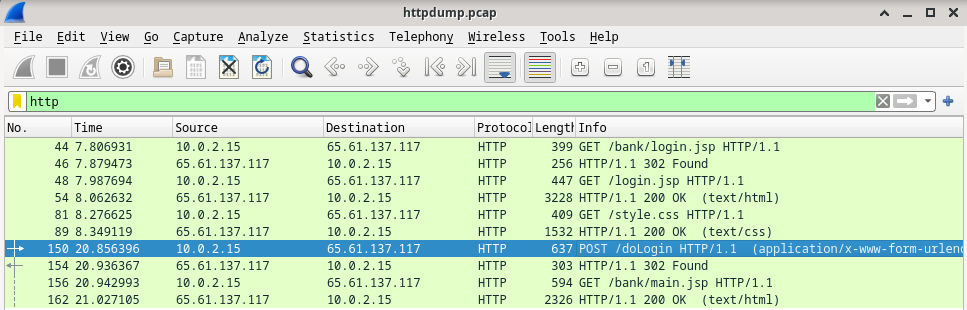
d. In the lower window, the message is displayed. Expand the HTML Form URL Encoded: application/x-www-form-urlencoded section.

What two pieces of information are displayed?
e. Close the Wireshark application.
Part 2: Capture and View HTTPS Traffic
You will now use tcpdump from the command line of a Linux workstation to capture HTTPS traffic. After starting tcpdump, you will generate HTTPS traffic while tcpdump records the contents of the network traffic. These records will again be analyzed using Wireshark.
Step 1: Start tcpdump within a terminal.
a. While in the terminal application, enter the command sudo tcpdump –i enp0s3 –s 0 –w httpsdump.pcap. Enter the password cyberops for the user analyst when prompted.
[analyst@secOps ~]$ sudo tcpdump –i enp0s3 –s 0 –w httpsdump.pcap
[sudo] password for analyst:
tcpdump: listening on enp0s3, link-type EN10MB (Ethernet), capture size 262144 bytes
This command will start tcpdump and record network traffic on the enp0s3 interface of the Linux workstation. If your interface is different than enp0s3, please modify it when using the above command.
All recorded traffic will be printed to the file httpsdump.pcap in the home directory of the user analyst.
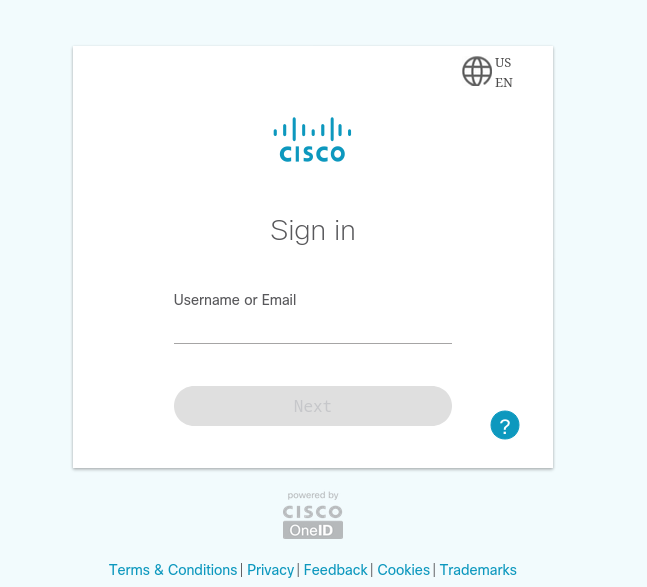
b. Open a web browser from the launch bar within the CyberOps Workstation VM. Navigate to www.netacad.com.
Note: If you receive a “Secure Connection Failed” webpage it probably means the date and time are incorrect. Update the day and time with the following command, changing to the current day and time:
[analyst@secOps ~]$ sudo date -s "12 MAY 2020 21:38:20
What do you notice about the website URL?
c. Click Log in.

d. Enter in your NetAcad username and password. Click Next.
e. Close the web browser in the VM.
f. Return to the terminal window where tcpdump is running. Enter CTRL+C to stop the packet capture.
Step 2: View the HTTPS capture.
The tcpdump executed in Step 1 printed the output to a file named httpsdump.pcap. This file is located in the home directory for the user analyst.
a. Click the Filesystem icon on the desktop and browse to the home folder for the user analyst. Open the httpsdump.pcap file.
b. In the Wireshark application, expand the capture window vertically and then filter by HTTPS traffic via port 443.
Enter tcp.port==443 as a filter, and click Apply.

c. Browse through the different HTTPS messages and select an Application Data message.
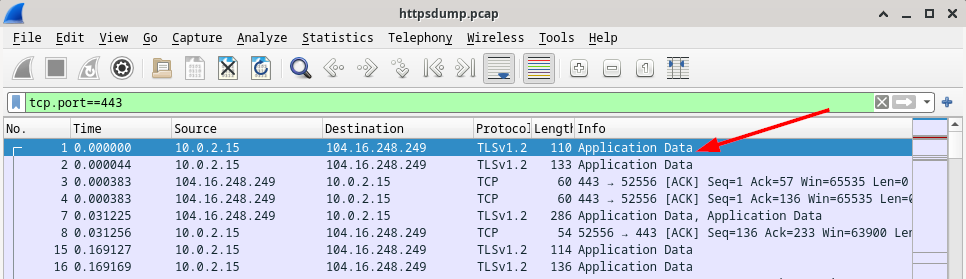
d. In the lower window, the message is displayed.
What has replaced the HTTP section that was in the previous capture file?
e. Completely expand the Secure Sockets Layer section.
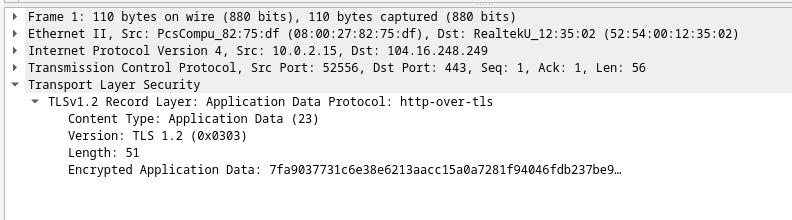
f. Click the Encrypted Application Data.
Is the application data in a plaintext or readable format?
g. Close all windows and shut down the virtual machine.
Reflection Questions
1. What are the advantages of using HTTPS instead of HTTP?
2. Are all websites that use HTTPS considered trustworthy?